Access Readers
This topic covers functionality related to Access Reader Properties, including configuring door timers, sending user commands to control doors, and view video from linked cameras, as well as retrieving and exporting reader activity history.
FEATURED TOPICS
Configure Readers
The Reader page allows the user to configure properties of a selected Door/Reader, and more.
RULES OF OPERATION
The following actions can be done from the Reader page.
-
Change Timers a selected door (unlock time &reclose time) .
-
Assign unlock schedule to a door.
-
Send user commands to a selected door (Pulse, Lock, Unlock).
-
View Reader Activity History for a selected reader.
-
Export Reader Activity for a selected reader (Excel/PDF ).
PREREQUISITES AND NOTES
- The user login account must have the appropriate security-level to open the Reader Properties page.
- The user login account must have permissions to issue user commands.
- The door unlock schedule must be created before it can be assigned.
- Reader email events require a working email address and the email output feature to be registered in the system licensing.
- External software must be installed to view reports in exported formats.
OPEN THE READER PAGE
There are two ways to open the Reader Properties page .
-
Side Menu: select "Hardware" menu icon and select Doors/Readers.
-
Dashboard: select 'Hardware' Tile (under Configure section) and select Doors/Readers.
![]() × Hardware icon (from sidebar menu)
× Hardware icon (from sidebar menu)
STEPS
-
Select the desired Loop/Cluster at the top left of the page.
-
Select the desired Reader/Door.
-
(optional) Edit the Door/Reader Name - as needed.
-
(optional) Assign a Door Unlock Schedule (the schedule must have already been created)
-
(optional) Set the Unlock Time as desired (5 seconds is the default)
-
(optional) Set the Reclose Time as desired (15 seconds is the default)
-
(optional) Enter an Email as desired (valid email required).
-
Click the Save button to save any changes.
RESULTS: the changes you made will be saved.
Closing the page without saving will cancel your changes.
Send User Commands to Door
User commands can be sent to only one door at a time from the Reader Properties page.
STEPS
-
Select the desired Loop/Cluster.
-
Select the desired Reader/Door.
-
Send the user command as desired ...
-
Click the Pulse button = to send a Pulse command (momentarily unlock) the door. The door uses the configured door timers to relock.
-
Click the Lock button = to send a Lock command the door.
-
Click the Unlock button = to send an Unlock command the door.
-
Click the Relay 2 Off button = to send a Relay Off command the Relay-2.
-
-
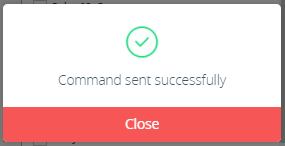
When you send the command, LaunchPoint should display a success confirmation.

IMPORTANT: Lock and Unlock commands stay in effect until the door schedule changes the state. If the door uses a custom schedule, the door will remain in the user-issued state until the next time the schedule changes. Therefore, you must manually return the door to the appropriate lock/unlock state that is normally expected if you do not want to wait for the schedule to change.
View Reader Activity History
User can view the Reader Activity History for one reader at a time from the Reader Properties page. The activity history can be viewed online or exported to an Excel file or PDF file.
STEPS
-
Select the desired Loop or Cluster.
-
Select the desired Reader.
-
Enable (check) the View History checkbox to open the Activity History page.
-
Enter the Start date/time.
-
Enter the End date/time.
-
Select at least one Event Type.
-
"check" will include the event type in the report.
-
"uncheck" will exclude or omit the event type from the report.
-
the Select All checkbox can be used to toggle on/off all the events.
When checked, the report will include all the activity that occurred at the reader within the start and stop dates.
-
-
Click the Get History button to retrieve the data.
RESULT: the list of events that fall between the start and stop times is displayed.
Unchecked event types are omitted.
MANAGE PAGE SIZES
The user can control how many events display per page.
-
At the bottom of the page, set the Number of Events per page [ 22, 55, 99, ... ]
-
Use the Page # droplist to select which page to display.
-
Click the GO button to advance to the selected page.
Export Activity History Report
The user can export the Activity History Report to Excel or PDF output.
STEPS
- Select the desired Loop or Cluster.
- Select the desired Reader.
- Enable (check) the View History checkbox to open the Activity History page.
- Enter the Start date/time.
- Enter the End date/time.
- Select an Event Type as desired.
"check" will include the event type in the report.
"uncheck" will exclude or omit the event type from the report.
the Select All checkbox can be used to toggle on/off all the events.
When checked, the report will include all the activity that occurred at the reader within the start and stop dates.
- Click the Get History button to retrieve the data.
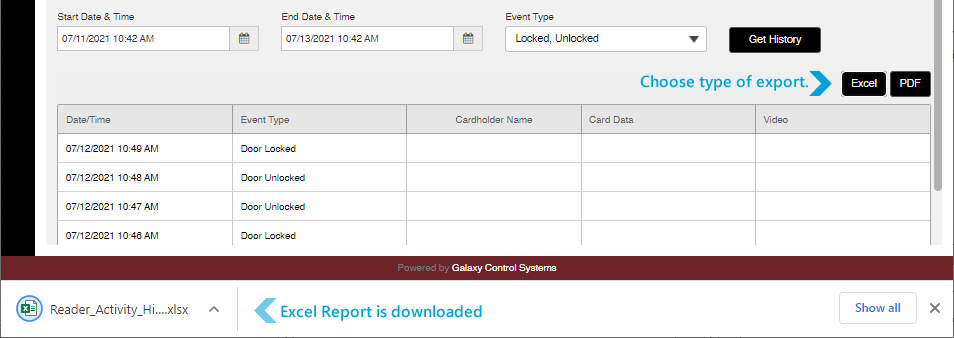
- Click one of the following buttons to export the report ... or the PDF button to export the report to a file.
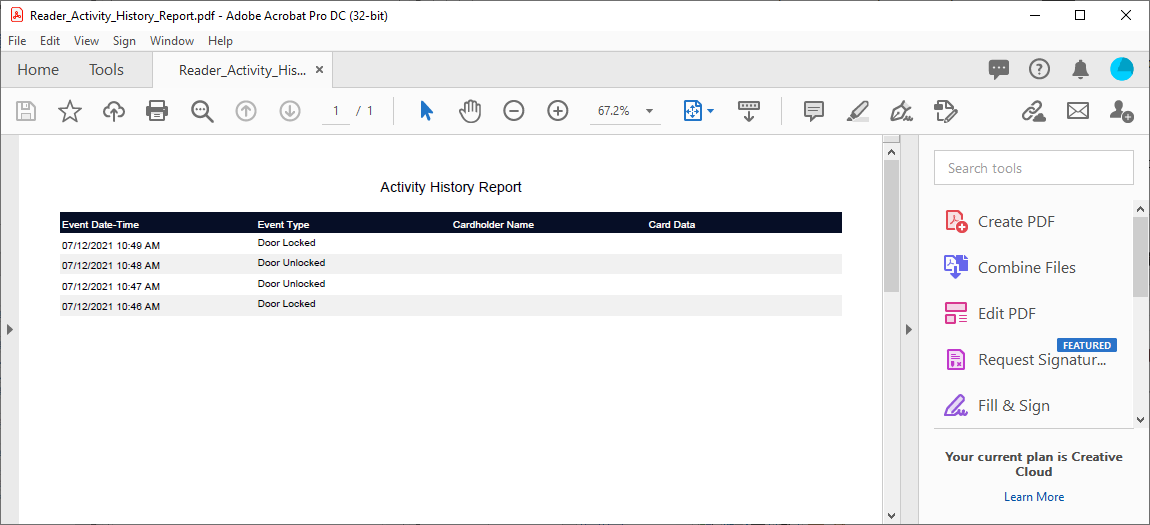
Click the PDF button to export the report to PDF file.
RESULT: the Activity History Report will open in the PDF Viewer that is installed on your computer.

Click the Excel button to export the report to Excel file
RESULT: the Activity History Report will be generated in an ".XLSX" format and downloaded in your browser. The exported file can be opened from your browser's downloads folder.

NOTICE: the Excel software may need to be installed, running, and logged-in before the report is exported. If you encounter error messages, try launching excel before you export the report.
IMPORTANT: before you leave or close the LaunchPoint Activity page, go ahead and open/review your exported file to verify your event history was really exported. Some errors may not be noticeable until you attempt to open the file and look at the contents. If the file is empty, re-export the report.
