Add a DSR Server
This topic provides the requirements and instructions to add a DSR Server to the SG-DSR Manager app.
NOTES & PREREQUISITES
-
The ASSA Locks must already be installed, configured, and connected to the DSR Server.
-
The DSR Assa Abloy Service must be running on the DSR Server computer.
-
The GCSWeb API Service must be running on the Galaxy Communication Server.
-
You must have created the master-level login in the System Galaxy software that you will use to sign into the SG-Manager App.
TIP: You can create a shortcut on the Windows desktop to easily launch the SG-DSR Manager App. You could also PIN the System Galaxy DSR Manager App to the Windows Taskbar for a convenient way to launch the app. Create 'run as admin' properties as needed.
Adding a DSR Server in the DSR Manager
-
Launch the SG-DSR Manager app .
-
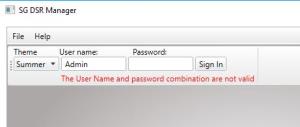
When the DSR Manager App opens, enter a valid master-level login name and password.
TIP: You can choose a color-theme for the App that suits your preference. ("Summer" is used in the screenshots of this help) -
Click the [SIGN IN] button to complete the login.
-
Select the DSR tab to begin.
-
Click the [Add New DSR] button.
TIP: You can click [Refresh DSRs] button to pick up any existing DSRs previously programmed - as needed.
-
Enter a logical name for the DSR that distinguishes it from other DSR Servers (now or in the future).
-
Enter the IP Address of the DSR Server.
-
Enter the correct Port number as needed (8080 = default).
-
Be sure the ACTIVE checkbox is enabled/checked.
-
Click SAVE button in the "Action" field on the same row as your new DSR.
TIP: you may need to click it twice. If the button does not disable, it means your click did not trigger the save. Sometimes the click only brings the focus to the field and you must click a second time to actually depress the save button.

Sign-in to SG-DSR Manager

Add new DSR | (example shows multiple DSRs)
Next Steps ...
Now you are ready to import the locks that are connected to this DSR Server.
(Add a DSR Server)
Additional Steps ...
EDIT LOCK SETTINGS & ALARM PRIORITIES
CREATE AUTHORIZATION PRIVILEGES
ENROLL CARDS / USERS (done in System Galaxy)
User Functions ...
< Also see FAQS / REQUIREMENTS