Creating SG Database Backups
This page describes how to create database backup files for the SysGal & SysGalArc databases.

TOPICS FEATURED
GENERAL REQUIREMENTS
This topic covers the requirements for backing up a database.
GENERAL REQUIREMENTS:
-
IMPORTANT: The default BACKUP location in the GCS Service Manager utility is not the best location since it is on the same physical drive as the databases. Preferably, you should choose a network folder that the IT Department will routinely back up. If you must point to a backup folder on the local hard drive, the best choice is the MSSQL Backup folder – for example “Program Files \ Microsoft SQL Server \ MSSQL15.GCSSQLEXRPESS \ MSSQL\Backup”.
-
TIP: If you want the GCS Service Manager utility to always Run as Administrator, right-click on the file and select Properties. Go to the Compatibility tab and check the box ‘Run this program as an administrator’.
CREATING DATABASE BACKUPS
This topic describes creating database backup files using the GCS Service Manager utility.
-
Open the GCS Service Manger from the System Galaxy folder: c:\GCS\System Galaxy\Utilities
-
Right-click on GCSServiceManager.exe and choose “Run as Administrator” from the menu.
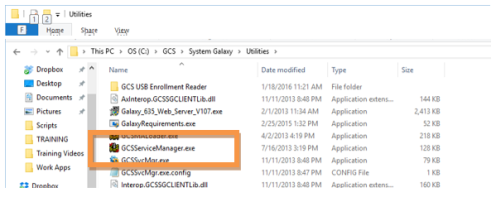
System Galaxy\Utilities > GCS Service Manager.exe
-
Click YES on the Windows ‘User Account Control’ message box.
-
Select (highlight) “MSSQL$GCSSQLEXPRESS“ and click the [Configure SQL Backup] button.
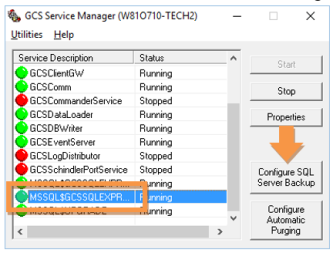
GCS Service Manager > showing MSSQL Service selected
-
Click the browse button and choose a good backup path where you want the backup files to be stored.
IMPORTANT: The default location is not the best since it is on the same physical drive as the database. Preferably, you should choose a network folder that the IT Department will routinely back up.
If you must point to a backup folder on the local hard drive, the best choice is the MSSQL Backup folder – for example “Program Files \ Microsoft SQL Server \ MSSQL15.GCSSQLEXRPESS \ MSSQL\Backup”.
(Where MSSQL15 is shown, this value may be different based on which version of SQL Server you are using.)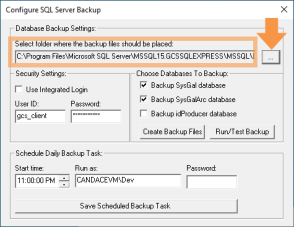
GCS Service Manager > Configure Backup Path
-
Click one of the backup buttons to create the backup files.
-
To make immediate backups, click the [Run/Test Backup] button.
This creates the date/time stamped .bak files for sysgal and sysgalarc databases.
-
To create a scheduled backup, click the [Create Backup Files] button.
This creates the .bat files needed to schedule a backup task in Windows Scheduler.
-
To create the daily backup task, click the [Save Scheduled Backup Task] button, which will use Windows Scheduler. You can also access Windows Scheduler from the Start Menu.
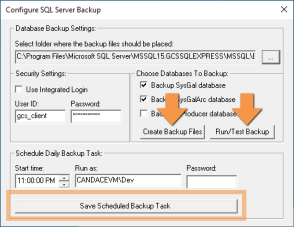
GCS Service Manager > Run the Backup.
-
-
A confirmation file named “SGBackupResults.txt” should automatically open in Notepad.
-
Be sure to view the results to ensure there were no errors.
NOTE: Failed backup reports will have Operating System Error Code 5: Access is Denied (See image below). This means that SQL Server does not have rights to place a file in the designated backup location. Try directing the backup to the default SQL Server location or consult with the local IT support staff.
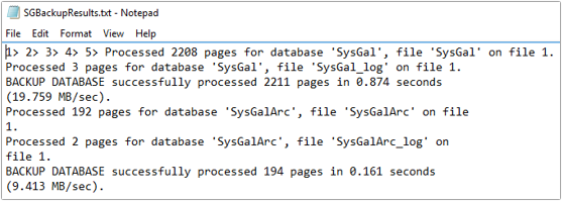
RunTest Backup > SG Backup Results
-
The backup process will also open the designated backup folder in Windows Explorer.
If the backup was successful, there will be two database backup files (.bak) that are time & date stamped. You will also see the bat file, the sql file, the results txt file (mentioned above).
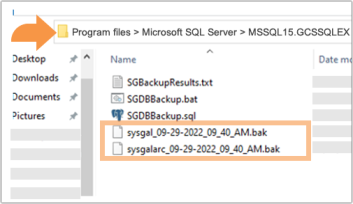
RunTest Backup > Timestamped Database Backup files
-